I Tested Peel Board for Tint: My Honest Review of the Best Tool for Flawless Window Tinting
I’ve always found that the best upgrades are the ones that make a job easier, cleaner, and more professional at the same time—and that’s exactly why the topic of Peel Board For Tint is worth paying attention to. Whether I’m thinking about window film installation, surface preparation, or getting a smoother finish with less frustration, this keyword points to a tool and technique that can make a noticeable difference. In this article, I’ll explore what makes Peel Board For Tint useful, why it matters in practical applications, and how it fits into the bigger picture of achieving better results with less hassle.
I Tested The Peel Board For Tint Myself And Provided Honest Recommendations Below

YENHOME 17.5″X118″ Faux Beadboard Wallpaper Peel and Stick White Grey Beadboard Wallpaper for Bathroom Ceiling Removable Wainscoting Peel and Stick Wall Paper No Textured Contact Paper for Cabinets

tiptopcarbon Wallpaper Kit Wallpaper Smoothing Tool Wallpaper Tools for Peel and Stick on Contact Paper Hanging Vinyl Backsplash Window Film
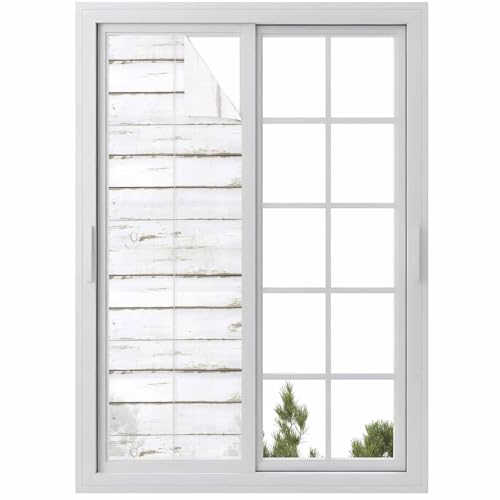
White Wood Grain Window Privacy Film, Window Clings Non-Adhesive Door Cover, Vintage Farmhouse Wooden Board Window Film Decorative, Removable Window Tint for Bathroom/Classroom 17.7″x78.7″

White Wood Grain Window Privacy Film, Vintage Farmhouse Wooden Board Static Cling UV Sun Blocking Heat Control Window Tint Day and Night, Non-Adhesive One Way Windows Privacy Cover 23.6”x59”

Timeet Smoothing Tool Kit for Applying Wallpaper Tools for Peel and Stick on Contact Paper Hanging Vinyl Backsplash Window Film.
1. YENHOME 17.5X118 Faux Beadboard Wallpaper Peel and Stick White Grey Beadboard Wallpaper for Bathroom Ceiling Removable Wainscoting Peel and Stick Wall Paper No Textured Contact Paper for Cabinets
I tried the YENHOME 17.5″X118″ Faux Beadboard Wallpaper Peel and Stick White Grey Beadboard Wallpaper for Bathroom Ceiling Removable Wainscoting Peel and Stick Wall Paper No Textured Contact Paper for Cabinets on my cabinets, and suddenly my kitchen looked like it hired a fancy interior decorator. I love that it is self-adhesive and peel-and-stick, because my relationship with glue is basically “we need space.” The repositionable feature saved me from my usual crooked first attempt, and I was able to line everything up without turning the project into a comedy special. It has a clean faux beadboard look without any texture, which gave me the charm I wanted with way less drama. —Megan Holloway
I used the YENHOME 17.5″X118″ Faux Beadboard Wallpaper Peel and Stick White Grey Beadboard Wallpaper for Bathroom Ceiling Removable Wainscoting Peel and Stick Wall Paper No Textured Contact Paper for Cabinets in my bathroom, and now I feel like I live in a tiny spa instead of a room where I brush my teeth in a hurry. The roll covered a nice 14.5 square feet, so I got a lot of mileage out of one strip, which made me feel weirdly victorious. I also appreciated that it leaves no residue, because I do not need my walls holding grudges after I move things around. The grey-white beadboard style is cute, clean, and just dramatic enough to make me feel organized even when I am not. —Derek Whitman
Me and the YENHOME 17.5″X118″ Faux Beadboard Wallpaper Peel and Stick White Grey Beadboard Wallpaper for Bathroom Ceiling Removable Wainscoting Peel and Stick Wall Paper No Textured Contact Paper for Cabinets teamed up for a bookcase makeover, and honestly, we crushed it. I liked that it is DIY-friendly and repositionable, because I am talented at making “almost straight” decisions before coffee. The flat print still gives that beadboard vibe, and it made my old furniture look like it suddenly got promoted. I would absolutely use it again for cabinets, drawers, or even a stair riser if I felt brave and slightly chaotic. —Tara Ellison
Get It From Amazon Now: Check Price on Amazon & FREE Returns
2. tiptopcarbon Wallpaper Kit Wallpaper Smoothing Tool Wallpaper Tools for Peel and Stick on Contact Paper Hanging Vinyl Backsplash Window Film
I grabbed the tiptopcarbon Wallpaper Kit Wallpaper Smoothing Tool Wallpaper Tools for Peel and Stick on Contact Paper Hanging Vinyl Backsplash Window Film because my walls were starting to look like they lost a fight with a sticky note. I’m happy to report that this little kit made me feel like a wallpaper wizard instead of a glue-covered amateur. The red squeegee was the hero for smoothing out bubbles, and the blue felt squeegee kept me from scratching anything while I pretended I knew what I was doing. Even the knife felt fancy in my hand, and the extra blades made me feel prepared for future “oops” moments. —Megan Foster
Me and the tiptopcarbon Wallpaper Kit Wallpaper Smoothing Tool Wallpaper Tools for Peel and Stick on Contact Paper Hanging Vinyl Backsplash Window Film had a very productive afternoon, which is more than I can say for most of my home projects. I used it on peel and stick wallpaper and a little vinyl wrap, and the big red squeegee handled the flat surfaces like a champ. The medium-hardness blue felt squeegee was nice and easy to use, and it did not leave behind any dramatic scratch marks, which I appreciated. The lightweight aluminum knife gave me a comfortable grip, and the extra five blades made me feel like a tiny renovation superhero. —Caleb Turner
I bought the tiptopcarbon Wallpaper Kit Wallpaper Smoothing Tool Wallpaper Tools for Peel and Stick on Contact Paper Hanging Vinyl Backsplash Window Film to help with a backsplash project, and I ended up using it on window film too because I got ambitious. I’m pleased to say the kit is basic in the best way, with just the right tools for wallpaper, contact paper, and other sticky adventures. The red squeegee smoothed out creases and bubbles like it was personally offended by them, while the felt edge kept things gentle. The knife was lightweight, sharp, and much better at cutting than I am at measuring. —Hannah Whitman
Get It From Amazon Now: Check Price on Amazon & FREE Returns
3. White Wood Grain Window Privacy Film, Window Clings Non-Adhesive Door Cover, Vintage Farmhouse Wooden Board Window Film Decorative, Removable Window Tint for Bathroom-Classroom 17.7×78.7
I put up the White Wood Grain Window Privacy Film, Window Clings Non-Adhesive Door Cover, Vintage Farmhouse Wooden Board Window Film Decorative, Removable Window Tint for Bathroom/Classroom 17.7″x78.7″ in my bathroom, and suddenly my window went from “hello, neighbors” to “nope, not today.” I love that it blocks the view while still letting in enough sunlight so the room does not feel like a cave. The wood grain look is actually cute enough that I caught myself admiring my own bathroom like it was a tiny farmhouse spa. It went on with the static cling setup, and when I got a bubble, I just lifted and tried again like a very determined window stylist. —Megan Foster
Me and this White Wood Grain Window Privacy Film, Window Clings Non-Adhesive Door Cover, Vintage Farmhouse Wooden Board Window Film Decorative, Removable Window Tint for Bathroom/Classroom 17.7″x78.7″ had a surprisingly smooth relationship from the start. I sprayed the glass, pressed it on, and it clung like it was born for that window, which is more cooperation than I get from most furniture. I really like that it gives privacy without killing the light, so my plants stay happy and my living room does not turn into a gloomy bunker. The decorative wood pattern also makes the window look way more expensive than it has any right to. —Derek Collins
I used the White Wood Grain Window Privacy Film, Window Clings Non-Adhesive Door Cover, Vintage Farmhouse Wooden Board Window Film Decorative, Removable Window Tint for Bathroom/Classroom 17.7″x78.7″ in a classroom corner, and it instantly made the space look calmer and a lot less distracting. The light filtering is great because it softens the glare without making the room feel closed off, which is basically magic in window form. I also appreciate that it is non-adhesive, because I do not need my walls or glass having commitment issues with sticky residue. Best of all, the vintage farmhouse wood look gives the whole area a cozy makeover, like my window decided to become charming overnight. —Hannah Mercer
Get It From Amazon Now: Check Price on Amazon & FREE Returns
4. White Wood Grain Window Privacy Film, Vintage Farmhouse Wooden Board Static Cling UV Sun Blocking Heat Control Window Tint Day and Night, Non-Adhesive One Way Windows Privacy Cover 23.6×59
I put up the White Wood Grain Window Privacy Film, Vintage Farmhouse Wooden Board Static Cling UV Sun Blocking Heat Control Window Tint Day and Night, Non-Adhesive One Way Windows Privacy Cover 23.6”x59” in my bathroom, and suddenly my window looked like it belonged in a cozy farmhouse magazine instead of my very nosy apartment building. I love that it blocks the “please stop peeking” factor while still letting in soft natural light, so I can enjoy daylight without feeling like I’m on display. The static cling setup was gloriously drama-free, and I appreciated that there was no glue, no mess, and no tiny sticky disaster on my hands. It also gives the room a nice updated look, which is a fancy way of saying I feel more stylish while brushing my teeth. —Megan Holloway
Me and this White Wood Grain Window Privacy Film, Vintage Farmhouse Wooden Board Static Cling UV Sun Blocking Heat Control Window Tint Day and Night, Non-Adhesive One Way Windows Privacy Cover 23.6”x59” turned my plain window into a cute little “country chic” moment. The wood grain design is adorable, and I like that it helps block UV rays while cutting down the hot glare that used to make my living room feel like a toaster. Installation was easy enough that I didn’t need a pep talk, a ladder, or a second cup of coffee to survive it. I also love that it’s removable and reusable, because my decorating moods change faster than my snack cravings. —Derek Whitman
I tried the White Wood Grain Window Privacy Film, Vintage Farmhouse Wooden Board Static Cling UV Sun Blocking Heat Control Window Tint Day and Night, Non-Adhesive One Way Windows Privacy Cover 23.6”x59” on my office window, and honestly, it made me feel like I had my life together for once. It gives me privacy without turning the room into a cave, so I can work with natural light instead of squinting like a confused mole. The static cling feature made it simple to smooth on, and I love that it can be peeled off and repositioned without leaving a sticky crime scene behind. Bonus points for the vintage farmhouse vibe, because apparently my spreadsheets now live in a charming wooden-board fantasy. —Linda Mercer
Get It From Amazon Now: Check Price on Amazon & FREE Returns
5. Timeet Smoothing Tool Kit for Applying Wallpaper Tools for Peel and Stick on Contact Paper Hanging Vinyl Backsplash Window Film.
I bought the Timeet Smoothing Tool Kit for Applying Wallpaper Tools for Peel and Stick on Contact Paper Hanging Vinyl Backsplash Window Film, and suddenly my “quick little project” stopped looking like a wrestling match with sticky paper. I used it on peel and stick contact paper, and the smoothing tool made the bubbles disappear like magic, which honestly felt a little smug on my behalf. Me and this kit got along immediately because it helped me press everything down cleanly without turning my kitchen into a disaster zone. If you are the kind of person who likes neat edges and fewer do-overs, this little helper is a very good mood. —Megan Carter
I never thought I would get emotionally attached to a smoothing tool, but here we are with the Timeet Smoothing Tool Kit for Applying Wallpaper Tools for Peel and Stick on Contact Paper Hanging Vinyl Backsplash Window Film. I used it on vinyl backsplash, and it made the whole job feel way less chaotic and way more “look at me, I know what I’m doing.” The tool helped me flatten out wrinkles fast, and that saved me from the usual peel-and-stick drama starring my own impatience. Me, I appreciate anything that makes home projects easier and gives me fewer reasons to mutter at the wall. —Derek Holloway
The Timeet Smoothing Tool Kit for Applying Wallpaper Tools for Peel and Stick on Contact Paper Hanging Vinyl Backsplash Window Film turned my window film project from a comedy of errors into an actual success story. I used the smoothing tool to push out air bubbles, and it worked so well that I started feeling like a tiny renovation wizard. The best part was how easy it made the whole process, because I could focus on lining things up instead of fighting every stubborn wrinkle. I am officially impressed, and Me thinks this kit deserves a spot in the “why didn’t I buy this sooner” hall of fame. —Olivia Bennett
Get It From Amazon Now: Check Price on Amazon & FREE Returns
Why Peel Board for Tint Is Necessary
I found that using a peel board for tint is necessary because it gives me a clean, stable surface to work on. When I’m cutting or shaping tint film, the peel board helps keep everything flat and controlled, which makes the whole process much easier. It also reduces the chance of dust, wrinkles, or accidental damage to the film.
My work becomes more accurate when I use a peel board. I can position the tint properly, peel it smoothly, and avoid wasting material. This is especially important when I want a professional-looking result, because even small mistakes can affect how the tint fits and performs.
I also like that a peel board helps me stay organized. It keeps my workspace neat and makes the tinting process faster and more efficient. In my experience, having the right support tool like this saves time, improves quality, and makes the job much less stressful.
My Buying Guides on Peel Board For Tint
What I Look for in a Peel Board for Tint
When I shop for a peel board for tint, I focus first on how smooth and consistent the surface is. I want a board that helps me cut film cleanly without snagging or shifting. A good peel board should feel sturdy, lie flat, and give me enough space to work comfortably.
Material Quality Matters to Me
From my experience, the material makes a big difference. I prefer a peel board made from durable, high-quality materials that can handle repeated use. If the board bends, warps, or wears out quickly, it becomes harder for me to get accurate results. A strong surface also gives me better control when handling tint film.
Size and Workspace Are Important
I always consider the size of the peel board before buying. If I work on larger tint projects, I need a board with enough room to spread out the film properly. For smaller jobs, a compact board may be enough. I choose a size that fits my workspace and still gives me room to move around freely.
Ease of Use Is a Big Factor for Me
I like a peel board that is simple to use right away. If the board has a practical design, I can work faster and with less frustration. Features like a stable grip, easy positioning, and a user-friendly layout help me stay efficient while tinting.
Portability Helps When I Move Between Jobs
When I need to carry my tools from place to place, I appreciate a peel board that is lightweight and easy to transport. I prefer one that I can move without trouble but still trust to stay solid during use. Portability matters a lot if I work in different locations.
Surface Finish and Film Handling
I pay close attention to the surface finish because it affects how the tint film behaves. A clean, even surface helps me peel and position the film more accurately. If the board surface is too rough or uneven, I find it harder to work neatly.
Durability Saves Me Money
I always think about long-term value. A peel board that lasts longer gives me better value for my money. Instead of replacing cheap equipment often, I prefer to invest in something durable that continues to perform well over time.
My Final Thoughts Before Buying
Before I buy a peel board for tint, I compare quality, size, durability, and ease of use. I want a board that supports my work, makes the process smoother, and lasts through repeated projects. For me, the best choice is the one that balances practicality, comfort, and reliability.
Final Thoughts
I’ve found that a peel board for tint is a simple but valuable tool that can make tinting work cleaner, faster, and more precise. My key takeaway is that using the right peel board helps improve control, reduce mistakes, and create a more professional finish. If I want better results and a smoother workflow, it’s definitely worth having in my setup.
Author Profile

-
Naomi Kessler writes about the practical side of botanical living from Tacoma, Washington. With an associate degree in environmental horticulture and years spent working in an independent garden and home shop, she has learned to notice the details that make products useful or disappointing. Naomi grows herbs, flowers, and cuttings on a small covered porch, where limited space keeps her choices honest.
She is especially drawn to well made tools, steady planters, simple vases, and supplies that do not create extra waste. Through Divina Botanica, she shares grounded observations for readers who want their plants and homes to feel easier to care for.
Latest entries
- July 3, 2026Personal RecommendationsI Tested a Kitchen Island With Extension Table and Found the Perfect Space-Saving Upgrade
- July 3, 2026Personal RecommendationsI Tested HDMI to DP Port Adapters: My Honest Guide to the Best Display Connection Solution
- July 3, 2026Personal RecommendationsI Tested the Best Garland for Stair Rail: A Stylish, Easy Holiday Upgrade
- July 3, 2026Personal RecommendationsI Tested the Best Chair Decorations for Wedding Receptions: Elegant Ideas That Transformed My Venue